Monday, April 29, 2013

Mixing Vinegar and Castile Soap - No?

This week's post is going to a be a little boring, but it has to be done. Here's a quick disclaimer.

After doing some more research there are many green cleaning recipes that recommend never to mix vinegar and castile soap, as one is an acid and the other a base.  As I cautioned earlier in the post 'All Purpose Cleaner', mixing the two together with cold water causes curdling, however this may occur even if stored in cold temperatures.  See the picture below.  Not good!


So what does this mean? Don't use the all purpose cleaner?  Does it not clean?

For me not at all.  Read on!

There are a couple of options you can take with the castile soap and vinegar.  The first is to clean with water castile soap mixture and then wipe with vinegar afterwards, however for myself and a busy schedule I need a quick cleaning solution, which means relying on a good all purpose cleaner.  Thus the second option, and one I choose to stick with is to use the all purpose cleaner.  Again, when I make my mixture, I make sure the water is warm and I store it under the kitchen or bathroom sinks at room temperature.

Doing it this way, I've had no issues using the two together and the cleaner works wonderfully in conjunction with baking soda.  I do also add a generous 10-20 drops of tea tree oil, the little bit of oil helps to mix the cleaner as well .

If you are worried, then go ahead and keep a bottle of vinegar and water mixture (which I keep as well) and some castile soap and water mixture in separate bottles.

OK not to kill this subject to death, but as a final thought, I'm not a chemist (frankly hated chemistry) but I truly LOVE the results I get from the All Purpose Cleaner so please do your own research and make your own judgement.  In the end it HAS to be a better option then all of the toxins in store product cleaners.

Wednesday, April 17, 2013

Furniture Polish


Here's another easy to make cleaner to polish your furniture, and one less product you need to buy!

As I've thrown out all my store bought chemicals, I realized shortly after that I no longer had a viable option for furniture polish.  I started doing some research online to make my own polish and the recipe below is the easiest to make and works great.  I can't believe I haven't done this before.  Simple and again you probably already have all the ingredients!


B's Furniture Polish: 
-Spray Bottle
-1/4 Cup Olive Oil
-1 Cup Vinegar
-2 tsp fresh lemon or 10-20 drops lemon essential oil (can be left out I like the smell)
-Funnel


Instructions:
Combine the above ingredients in a spray bottle using the funnel and shake to mix the ingredients.  I would recommend using this polish with microfiber cleaning cloths and perhaps conduct a pretest to ensure it's suitable for your furniture.  I've been using it extensively in my kitchen to remove hard water stains on my dark cabinets.  Works wonderfully!

Check it out yourself.


Tuesday, April 9, 2013

Under the Kitchen Sink


Finally! I have been waiting to talk about organization and what better way then to tie it in with homemade cleaning products!

Having gotten rid of all my excess cleaners has freed up a lot of space under my kitchen sink, allowing me the freedom to organize and make it more functional.  Why does this matter you say???   Well for one, knowing exactly what products you have saves you time and money, as you're not unnecessarily restocking or looking for items you need.  Secondly, I take pride in my homemade cleaners and I love seeing them where I can grab them on the go.  Trust me when I say you'll stress less, and have more time to focus on more important things!

Here are my simple tips that keep my supplies organized in the kitchen.

In the front bin I keep my most used cleaners (labeled), including the baking soda.  I also store the castile soap and other supplies I need to make my cleaners.  Organizing like items in baskets or bins helps keep clutter under control. (I bought my bins from the Dollarstore).  Remember only keep those items that you absolutely need!


The other bin under my sink stores my cleaning supplies and extra items I may require to clean my kitchen.  Items such as the microfiber cloths, j-cloth, gloves, extra sponges, toothbrush, etc.  Again I would recommend storing these items in the front,  as you will always know what you have or don't have on hand,  should you need to replace. 
In the silver container I keep our dishwasher soap.  I am still in search of a natural dishwasher soap recipe, but I haven't come across any that seem to work. Leave me a comment if you are using one that does!

That's it, pretty simple!  Remember take the time to organize and declutter, you will save time and money in the long run.


Hope you find this helpful!

Thursday, April 4, 2013

Power Breakfast Smoothie

As I'm still changing things up this week, I thought I'd share my favorite super healthy breakfast smoothie.  If you're wondering about what this has to do with cleaning, well it has to do with eating healthier to cleanse your body!  Part of my new year's resolution for my family and myself was to remove processed food as much as we can from our diets and we're trying our best to live by this.  As I'm usually pretty rushed in the morning, this is a great on the go breakfast that I take to work in a travel mug.  I have it every single day, and only usually cheat on the weekends.  The added bonus is I sip it throughout the morning and it keeps me full a lot longer then a piece of toast.

I've tried many different smoothies and I love this one as it's easy to make, high in nutrition, uses (mostly) organic wholesome ingredients and most importantly again keeps me full until lunch!

B's Power Breakfast Smoothie

2 tbsp Greek Yogurt
1 cup Unsweetened Almond Milk
1/4 cup Quick Oats (I purchase organic PCs quick rolled oats)
1 tbsp Organic Traditions Chia and Flax Seed Powder (substitute for any chia/flax powder or grind your own)
1/2 Banana
3 Frozen Strawberries (organics PC is excellent and available at Loblaws/Zehrs)
1/4 cup Power Blend Frozen fruit (again organics PC - contains blueberries, cherries and blackberries)
1 cup Spinach
1/2 tsp Honey
Blender


Directions:

In your blender combine the oats and chia powder and a little water, enough to soak the oats, and blend first into a smooth pulp.  The reason I do this is because I've found the oats don't blend properly when combined with other ingredients and remain chunky (which doesn't work sipping on a straw)!  To that add the rest of your ingredients and blend to a smooth consistency.  Pour into a glass or travel mug and you're good to go.


Let me know if you try it!

Monday, April 1, 2013

Brown Sugar Salt Scrub


Let's change things up a bit from all the cleaning talk and talk about something that I have a lot more fun with (ok not really maybe just as much fun), scrubs!  I was looking for a good organic scrub, (especially needed after a very harsh Canadian winter), and the one I did finally like that seemed to contain less chemicals ran at about $65 from the company Fresh at Sephora.  There was no way I was going to spend that kind of money on a scrub that contained primarily brown sugar!  So I started experimenting with different homemade scrubs and the one I am sharing now is probably my favorite.

It's got loads of really great skin soothing properties with almond and coconut oil and exfoliating properties with brown sugar and salt.
Brown Sugar

B's Brown Sugar Salt Scrub
1 cup brown sugar
1/4 cup salt
3 tbs coconut oil
3 tsp almond oil


Instructions:
Combine the above ingredients in a large bowl until it thoroughly forms into a paste.  You may also add extra oil if the scrub seems dry.  Once done, transfer to pretty little containers,  (ok you don't have to but it's just a nice little touch) and enjoy!  That's it!  Simple easy and all natural!


How to use:  One quick tip on how to use.  I've used this scrub on my hands with a little bit of water (and my husbands course dry hands) and it has completely removed all dead skin!  If you have super sensitive skin you can choose to wet your hands and not add any salt (substitute with extra brown sugar) to the mixture..

In the shower it is best to use the scrub as the final step.  After you have soaped and rinsed scrub in circular motions and rinse with warm water.  As an added bonus you won't need to moisturize afterwards and the scrub will leave your skin smelling so sweet, without any artificial fragrance or chemicals!  The only thing to be careful is that due to the oil it will leave your shower slippery, so be careful.  I usually spray some vinegar in the shower and rinse with hot water to remove the oil (not to mention a quick clean of the shower).

Thursday, March 28, 2013

Cleaner Floors Today!

I've introduced you to the few products I use to clean my house, and here's another great way to use them to clean your floors.

In our house we have dark ceramic floors and hardwood in the living room.  The ceramic tiles are fairly low maintenance.  A quick sweep and they usually 'looked' clean.  I would once a week or so use a Swiffer Sweeper with a wet mopping cloth attached at the end.  Although the floors would be clean, they would leave a very strong chemical smell behind and almost a sheen on our floors.  The Swiffer replacement wet mopping cloths were expensive to purchase and I would easily go through 3 during one clean!  There had to be a better, more natural and not to mention cheaper way to clean our floors.

Of course there is, and the best part it is very similar to the All Purpose Cleaner (no extra products required).

B's Floor Cleaner: 
Large Bucket
Mop
4 tbsp Castile Soap (can be substituted with liquid dishwashing soap)
Warm to hot water (depends on how much floor there is to clean)
10-15 drops of Tea Tree Oil
2-3 cups Vinegar (depends on how much floor there is to clean)

Instructions:
In your bucket first add the castile soap and then warm to hot water depending on how much floor you have to clean, then add in the tea tree oil and stir.  Finally add the vinegar to this mixture (make sure the water is still warm to prevent curdling).  Soak your mop and clean away!

My floors have never looked cleaner, without any residue or chemicals left behind and there's even a nice shine to them.  Don't be worried about the smell of vinegar on the floors as the floors won't smell once dry.

Word of advice:  For hardwood floors I do use the same mixture however you have to be careful of not soaking your floors with too much water.  Make sure to rinse as much of the excess water, and the best way to dry and buff (to ensure the shine is there) your hardwood floors is to go over them with a mop that has a Swiffer duster/microfiber type attachment.  I also go old school and sometimes get down on my hands and knees to buff them with my All Purpose Cleaner in hand.

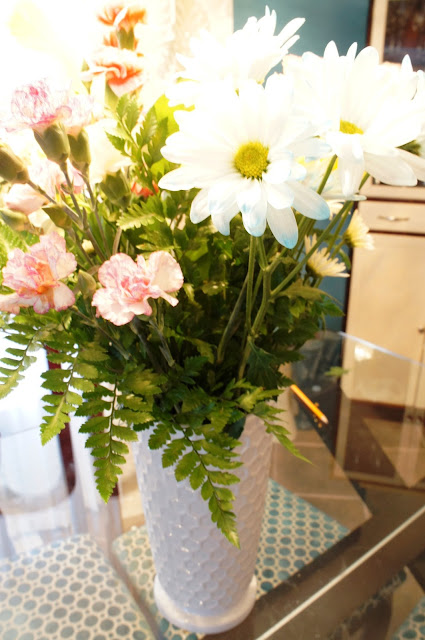
Now I didn't want to take a before and after of floors, because well how exciting is that?  Here's a picture of some flowers I just got that will definitely brighten our home for spring and this lackluster post on floor cleaners!


Monday, March 25, 2013

Cleaning tip - Stove Top

Today I thought I'd share some stove top cleaning tips.  I have a glass top stove which has always been a little tricky to clean.  I normally use a special glass top cleaner and scraper from Home Depot to clean the stove and have to admit it left my stove super clean, (even removed all the burned spots).  I was a little skeptical to try vinegar and baking soda to clean my stove, but I thought I'd give it a go and am SO impressed with the results.

I'm not sure of the results on other stove tops, but I am certain it will work just as well.  I do recommend purchasing a scraper for glass top stoves as it does an excellent job scraping off burned spots.

Before I share some cleaning tips, here's a shot of my stove.  I went a week without cleaning it so that I could test out my cleaning method, and also ensure there was plenty of burned spots.  Trust me when I say it was pretty grimy!


Steps to clean a glass top stove:

  • Sprinkle baking soda all over the stove and give a thorough soaking of vinegar water mixture or the all purpose cleaner.  
  • Let it soak for 10 min and then using a dishwashing sponge and liquid dishwashing soap (or castile soap if you have that) give your stove top a good scrub.  
  • Without wiping the stove, use the scraper and remove all the hardened spots.
  • Wipe with a wet sponge or j-cloth.
  • You may need to repeat the steps by spraying with another coating of vinegar and again with the scraper clean off any excess spot.

...And here's the after shot following the above steps!  The only con I see is that you may need a little more elbow grease, but it's ok as you're not smelling all the toxic fumes!  (Ignore the scratches, I got that when I initially was using a pot that was damaging my glass element).

Sold yet???